
10 Creative Birthday Cards For Sister DIY That She’ll Treasure
Forget the generic cards at the store! This birthday, show her some extra love with a one-of-a-kind, birthday cards for sister DIY. Whether your sister is a girly-girl or a total rockstar, there’s a perfect, handmade card waiting to be created.
Tools To Consider When Making DIY Birthday Cards For Sister

Before diving into the creative process of making birthday cards for sister DIY, it’s essential to gather the right tools. Here are some basics you might need:
- Scissors: Regular scissors will do most of the job. Pinking shears can add a decorative touch
- Stencils: Achieve consistent lettering or repeated patterns easily.
- Stamps: Fun for adding patterns, messages, or cute images. Comes in many themes to match your chosen birthday cards for sister DIY.
- Markers/pens: Fine-tipped markers or pens for writing messages and drawing. Consider glitter pens or metallic markers for an extra touch.
- Paints and brushes: Watercolor paints can create soft backgrounds or accents. Acrylic paints work well on heavier materials like cardboard.
- Embellishments: Buttons, ribbons, sequins, glitter, stickers, or washi tape can add pops of color and texture.
- Glue stick: A basic all-rounder for adhering paper, cardstock, and lightweight embellishments.
- Double-sided tape: Creates a strong bond for heavier embellishments or 3D elements.
Lists Of Unique Birthday Cards For Sister DIY To Celebrate Sisterhood
This guide is packed with easy and fun ideas that you can make at home, using everyday supplies. Get ready to unleash your creativity, add a heartfelt message, and craft birthday cards DIY for sister that she will cherish forever!
DIY Embroidered Birthday Cards For Sister

Embroidery adds an elegant and personalized touch to any handmade birthday cards for sister, making it a perfect choice for celebration.
Materials
- Cardboard (recycled from cereal boxes or cardstock works too!)
- Fabric scraps in colors of your choice
- Embroidery needle (blunt-tip for beginners is safer)
- Embroidery floss in colors to match your fabric
- Scissors
- Pencil
- Optional: Embroidery hoop (keeps fabric taut while stitching)
- Optional: Trinkets, buttons, or beads for embellishments
Step-by-step guide
- Fold your cardboard in half to create the card size. You can adjust the size of birthday cards for sister DIY depending on how big you want.
- Lightly sketch your design on the card front using a pencil. It can be anything from her initials, flowers, a birthday cake, or a simple message like “Happy Birthday.” Keep it simple for a beginner’s project.
- Cut a piece of fabric slightly larger than your embroidery design.
- If your design is intricate, you can trace it onto the fabric with a pencil or fabric pen that washes out later.
- Thread your needle with embroidery floss and follow basic embroidery stitches like backstitch or satin stitch to fill in your design. There are many online tutorials with visual guides for these stitches [YouTube: How to do basic embroidery stitches].
- Once your embroidery is complete, you can glue the fabric onto the card base.
- Add a personal touch by gluing on buttons, beads, or small trinkets related to your sister’s interests.
- Write a heartfelt birthday message inside the card.
DIY Letterboard Birthday Card For Sister

If your sister appreciates modern design and witty messages, letterboard is the perfect choice for birthday cards for sister DIY.
Materials
- Cardboard (can be cut from a cereal box)
- Colorful cardstock (2 colors)
- Ruler
- Pencil
- Scissors
- Craft knife (optional, for a cleaner cut on the frame)
- Alphabet stickers (black or another contrasting color) OR black marker
- Glue stick
- Embellishments (optional: glitter, ribbons, buttons)
Step-by-step guide
- Cut a piece of cardstock (color 1) to your desired size (e.g., 5×7 inches for a standard card).
- Cut another piece of cardstock (color 2) slightly larger than the base card. Score lines (light cuts with a ruler and craft knife) about 1 inch from the edges to create a frame. Fold the scored lines inwards. You can also glue a pre-made frame from construction paper.
- Glue the framed piece (color 2) onto the base card (color 1).
- Use alphabet stickers to spell out your message on the frame (inside the rectangle). Alternatively, write your message directly on the frame using a black marker.
- Add a birthday-themed message or inside joke for your sister. Decorate with glitter, ribbons, buttons, or any other embellishments you like.
- Write a sweet birthday message inside the card.
Scroll-style Birthday Card For Sister DIY

A scroll-style birthday card evokes images of ancient manuscripts and fairy tale scrolls. By incorporating this unique format into your DIY birthday cards for sister, you can create a piece of art that’s fit for a princess.
Materials
- Construction paper in two colors (one for the base and one for the contrast)
- Ribbon
- Scissors
- Ruler
- Pencil
- Markers, crayons, or other decorative materials (glitter, stickers, etc.)
- Decorative items like buttons, lace or dried flowers (optional)
Step-by-step guide
- Decide on the dimensions of your birthday cards for sister DIY. You can make a long and narrow card or a wider one. Cut the construction paper in your chosen dimensions.
- On a separate piece of construction paper in a contrasting color, write your birthday message to your sister. You can get creative with the lettering and use markers, crayons, or stencils.
- This is where you can personalize the card for your sister. You can add drawings, stickers, glitter, or any other embellishments that you think she would like.
- Carefully line up the message panel with the top of the base construction paper. Once you’re happy with the placement, secure it with glue or tape.
- Carefully roll up the bottom portion of the card towards the top, creating a scroll effect. You can adjust how much you want to roll up to control the amount of message that is visible at first glance.
- Tie a ribbon around the rolled-up portion of the card to secure the scroll and add a decorative touch. You can tie the ribbon in a simple knot or get more creative with a bow.
- For an extra special touch, you can add some small decorative items to the front of the card like buttons, lace, or dried flowers.
DIY Die-cut Birthday Card For Sister DIY

Die-cutting machines allow for intricate and detailed designs in DIY birthday cards.
Materials
- Cardstock (in colors you think your sister would like)
- Scissors or paper cutter
- Die-cut template (you can find free printable templates online or create your own design)
- Glue stick or other liquid adhesive
- Pens, markers, or colored pencils (optional)
- Embellishments (optional): glitter, sequins, buttons, ribbons, etc.
Step-by-step guide
- Select cardstock in colors that suit your sister’s taste. Find a die-cut template online that matches your theme (e.g., flowers, balloons, cake) or draw your own simple birthday cards for sister DIY.
- Carefully cut out the main design element from your chosen cardstock using scissors or a paper cutter.
- Fold a separate piece of cardstock in half to create the base of your birthday card.
- Adhere the die-cut shape onto the front of the base card using your glue stick.
- Decorate the inside and outside of the card with pens, markers, or colored pencils. Write a heartfelt birthday message to your sister. Add embellishments like glitter, sequins, buttons, or ribbons for extra pizazz.
Sprinkle Lollipops Birthday Cards For Sister DIY

For a sweet and whimsical birthday card, consider incorporating sprinkle lollipops into your decor and DIY ideas.
Materials
- Blank cards (any size you like)
- Cardstock (optional, for added sturdiness)
- Lollipop sticks
- Circle punch (in two sizes, one slightly smaller than the other) – you can substitute a compass and craft knife if you don’t have a punch
- Rainbow sprinkles (or any color your sister likes)
- Low-temperature hot glue gun
Step-by-step guide
- Use the circle punch (or draw circles) on the cardstock (or directly on the card if it’s thick enough). Cut out two circles per card, one slightly smaller than the other. Glue the circles together to create a dimensional lollipop shape.
- You can break the lollipop stick to your desired size or use scissors to cut it cleanly.
- Heat up your low-temperature hot glue gun. Apply a small amount of glue to the edge of the larger circle (the “lollipop top”).
- While the glue is still hot and soft, quickly dip the glued edge into the sprinkles, coating it completely.
- Let the sprinkles cool and shake off any excess. Glue the lollipop stick to the back of the smaller circle (the “lollipop base”). Glue the entire lollipop assembly onto your blank card.
- Use markers, pens, or stickers to write a birthday message on the birthday cards for sister DIY. You can also add other embellishments like glitter, ribbons, or small cut-out shapes to match your sister’s interests.
DIY Printable Modern Birthday Cards For Sister

If you’re short on time or prefer a minimalist aesthetic, printable DIY birthday cards for sister are a convenient option.
Materials
- Computer with internet access
- Printer
- Cardstock or thick colored paper
- Scissors or paper cutter
- Ruler
- Optional: Ribbon, markers, stickers, or other embellishments
Step-by-step guide
- Find online templates for birthday cards for sister DIY. There are many websites that offer free printable cards in various styles, including modern designs. You can search for “DIY printable modern birthday cards” or “free printable birthday card templates”.
- Choose a template that you like and download it to your computer.
- Edit the template if desired. You can use software like Microsoft Word or Canva to add your own personal touches to the card, such as changing the colors, fonts, or adding text or photos.
- Print the card on cardstock or thick colored paper. Make sure your printer is set to print on the correct paper type and size.
- Cut out the card along the edge of the template.
- Fold the card in half (if the template is not already folded).
- Decorate the card further if desired. You can add embellishments such as ribbon, markers, stickers, or glitter.
- Write a heartfelt message to your sister inside the card.
Candle Birthday Cards For Sister DIY

Candles are a classic symbol of birthday celebrations. Incorporate this timeless element with birthday cards DIY for sister design:
Materials
- Cardboard (any color you like for the base)
- Construction paper (in various colors for the candles and decorations)
- Scissors
- Glue stick
- Markers, crayons, or colored pencils (for decorating)
- Optional: Glitter, buttons, ribbons, or stickers
Step-by-step guide
- Cut your cardboard in half to create a rectangle. Fold it in half to form the card base.
- Cut out flame shapes from orange or yellow construction paper. Cut long, thin rectangles in various colors for the candle bodies. Glue the flame shapes onto the top of the rectangles.
- Glue the candles onto the front of the birthday cards for sister DIY. You can arrange them in a straight line, a birthday cake shape, or get creative!
- Use markers, crayons, or colored pencils to draw birthday messages, balloons, cake, or anything else you think your sister would love. Get fancy by adding glitter, buttons, ribbons, or stickers!
- Inside the card, write a heartfelt birthday message to your sister.
Colorable Printable DIY Birthday Cards For Sister

Combine creativity and relaxation with colorable handmade birthday cards for sister.
Materials
- Printable Template
- Cardstock paper
- Coloring supplies
- Decorative touches (optional)
- Scissors
- Envelope (optional)
Step-by-step guide
- Choose and download your favorite birthday card template. Print it on cardstock paper.
- Let your creativity flow! Encourage your sister to color the design to her heart’s content.
- Add some sparkle with glitter glue, stickers, or washi tape for an extra special touch.
- If the template has any elements to be cut out, carefully cut them out with scissors.
- On the inside of the birthday cards for sister DIY, write a heartfelt birthday message to your sister.
- Fold the card in half (if not already folded) and present it to your sister! If mailing, slip it into an envelope and send it off with love.
Deserts Design DIY Birthday Cards For Sister

For unique and eye-catching DIY birthday cards for sister, consider incorporating desert-inspired designs.
Materials
- Cardstock (different colors for variety)
- Scissors
- Glue stick
- Markers/colored pencils/crayons
- Optional: Glitter, buttons, fabric scraps, stickers (anything related to desserts!)
Step-by-step guide
- Choose your cardstock color and fold it in half to create the card base.
- Cut out a triangle from a different color cardstock for the cone and glue it onto the card front. Decorate with stripes, polka dots, or write a message on it. Use a white or brown marker to draw a swirl for the ice cream on top. Add sprinkles with glitter or tiny circles cut from construction paper.
- Write a birthday message for your sister inside the birthday cards for sister DIY. You can also add her name to the front of the card using markers or cut out letters from another color cardstock and glue them on.
- Glue on tiny fabric scraps for cupcake liners or a “cherry” on top. Use stickers related to desserts like cupcakes, sprinkles, or ice cream cones. Add a border of glitter glue around the card for extra sparkle.
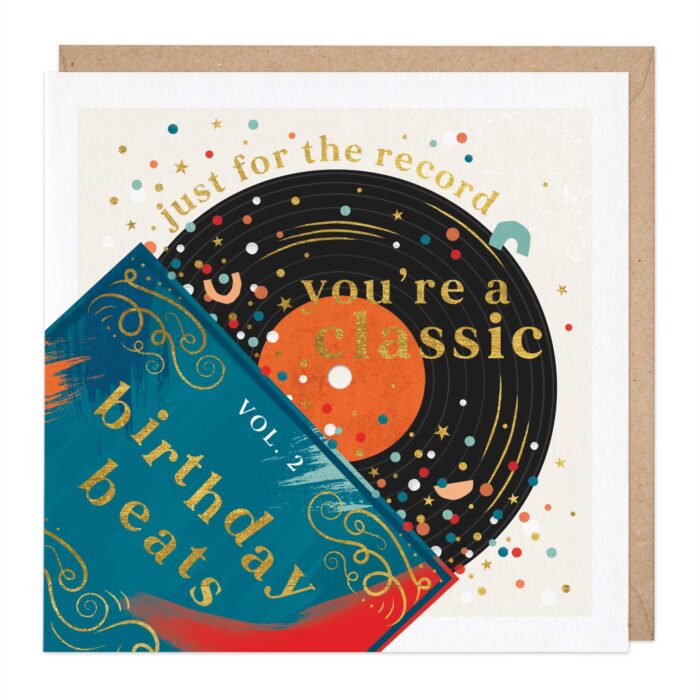
Retro Record Birthday Cards For Sister DIY

If she’s the one who loves vintage style and music, retro record-themed handmade birthday cards for sister are the perfect choice.
Materials
- Cardboard (recycled cereal boxes work great!)
- Scissors
- Ruler (optional)
- Pencil
- Compass (or something round to trace a circle)
- Black marker
- Colorful markers, pens, or paints (optional)
- Stickers (music notes, peace signs, etc. – optional)
- Glue stick
- Colorful cardstock (for the base of the card)
- Envelopes
Step-by-step guide
- Cut a rectangle from your cardstock, size depending on your preference. Fold it in half to create the card.
- On your cardboard, trace two circles (one slightly smaller than the other) to make the record. Cut them out.
- Decorate your “record”! Use the black marker to draw a record label in the center of the larger circle. You can add details like a record company logo or a funny message. Let your creativity flow!
- Use your colorful markers, paints, or stickers to decorate the record’s outer rim. Think rainbow swirls, polka dots, peace signs, or anything your sister digs.
- Glue the smaller circle on top of the larger circle, slightly off-center to create a 3D record effect.
- Apply glue to the back of your record and attach it to the front of your card base.
- Write a heartfelt birthday message inside the birthday cards for sister DIY. Mention a favorite song you both share or a funny memory about listening to music together.
- Slide your card into a colorful envelope and prepare to put a smile on your sister’s face!
Some Tips For The Best DIY Birthday Card For Sister
Whether you opt for an embroidered masterpiece, a modern printable, or a whimsical scroll-style birthday cards for sister DIY, the key is to infuse your creation with love and thoughtfulness. Here are a few suggestions to ensure that your card is as special as she is:
- Theme: Choose a theme related to her hobbies or favorite things. Does she love cats, reading, a certain sport, or video games? Build the card around that theme using pictures, drawings or related embellishments.
- Memories: Include a small collage of pictures of the two of you together throughout the years.
- Beyond paper: Don’t limit yourself to just construction paper! Use fabric scraps, buttons, ribbons, or dried flowers to add texture and dimension.
- Handmade decorations: Make your own decorations with markers, paint, or stamps.
- Neatness counts: Take your time and make sure the card is neat and well-crafted.
See more for some amazing DIY birthday cards that shall melt their heart:
- DIY Birthday Cards For Dad That Will Make His Day Extra Special
- 10 Creative DIY Birthday Cards For Mum That Show Your Care
- Creative Birthday Card DIY For Friend: Easy Ideas & Inspiration
Conclusion
This guide has provided a plethora of creative ideas for DIY birthday cards that can give as gift ideas and surely make your sister feel loved and cherished on her special day. So roll up your sleeves, gather your supplies, and get ready to craft a birthday card your sister will treasure forever.
And remember, the best gift of all is the time spent together, so be sure to enjoy the birthday festivities with your sister to the fullest. Happy crafting and happy birthday to your amazing sister!