
Top 10 DIY 70th Birthday Card Ideas To Make The 70s Perfect
Turning 70 is inherently a special milestone, so birthday cards need to be just as special. In this article, we’ll explore the top 10 ideas to create the perfect DIY 70th birthday card. Let’s dive into the world of creativity and nostalgia.
What Should A DIY Card For A 70th Birthday Look Like?
When designing a DIY 70th birthday card, it’s crucial to consider the significance of the milestone. Here are some tips to guide you in creating a card that truly reflects the essence of turning 70:
- Embrace Vintage Vibes: Incorporate elements that harken back to the past. Think about using sepia tones, retro fonts, and nostalgic imagery that evoke the feeling of the good old days.
- Celebrate Milestones: Highlight significant life events in the card design. Whether it’s achievements, travels, or family milestones, creating a timeline of memorable moments adds a personal touch.
- Choose Elegant Colors: Opt for sophisticated color schemes that convey a sense of wisdom and grace. Deep blues, golds, and rich burgundies can add a touch of refinement to your DIY creation.
Best DIY 70th Birthday Card Design For A Special Milestone
In this section, we’ll explore the finest DIY designs that go beyond the ordinary, capturing the essence of a life well-lived. From nostalgic timelines to interactive shaker cards, these creative DIY 70th birthday cards are sure to make the 70th birthday celebration truly special.
Timeline Collage – Life’s Moments Mosaic
Crafting a timeline collage is a heartfelt way to reminisce about the journey of life. Here’s what you’ll need:
- Supplies: Old photographs, cardstock, glue, markers

- Instructions:
- Select Diverse Photographs: Choose a variety of photos that represent different life stages, from childhood to recent years.
- Prepare Your Canvas: Use sturdy cardstock as the base for your collage, ensuring it’s large enough for multiple photos without feeling cluttered.
- Arrange Chronologically: Lay out the selected photos in chronological order, creating a seamless visual timeline of the individual’s life.
- Caption Each Moment: Add captions beneath or beside each photo to succinctly capture the significance of each moment.
- Secure with Glue: Affix each photograph securely to the cardstock using glue, creating a cohesive and visually appealing composition.
- Personalize with Markers: Enhance the collage with markers by adding dates, short anecdotes, or decorative elements for a personalized touch.
- Admire Your Creation: Step back and appreciate the completed timeline collage DIY 70th birthday card—a heartfelt and visual celebration of seventy years of memories.
Memory Lane – Winding Through Memories
Crafting a Memory Lane birthday card is a heartfelt way to stroll through cherished moments. Here’s what you’ll need:
- Supplies: Meaningful photos, cardstock or a blank card, glue or double-sided tape, markers or pens.
- Instructions:
- Choose Meaningful Photos: Select a range of photos capturing significant moments and stages of the individual’s life.
- Arrange Chronologically: Lay out the photos on the cardstock or blank card in chronological order, creating a visual journey through the years.
- Create a Winding Path: Arrange the photos in a winding or meandering pattern to symbolize the unique path of the individual’s life.
- Attach Securely: Use glue or double-sided tape to securely attach each photo to the card, ensuring a neat and polished look.
- Personalize with Markers: Add dates, brief captions, or notes beside each photo using markers for that personal touch.
- Reflective Notes: Leave blank spaces for handwritten reflective notes or additional well-wishes from friends and family.
- Extend Theme Inside and Out: Carry the Memory Lane theme to both the interior and exterior of the DIY 70th birthday card, adding any decorative elements that enhance the design.
- Final Review: Take a moment to review your creation, ensuring all photos are securely attached and the design aligns with the sentimental journey.
Vintage Theme – Nostalgic Elegance
Crafting a Vintage Theme birthday card exudes nostalgic elegance. Here’s what you’ll need:
- Supplies: Vintage photographs, cardstock or a blank card, lace or vintage-themed embellishments, glue or double-sided tape, and markers or pens.

- Instructions:
- Select Vintage Photographs: Choose aged photographs that carry a vintage aesthetic, reflecting the charm of bygone eras.
- Arrange Thoughtfully: Lay out the vintage photos on the cardstock or blank card, paying attention to a thoughtful and aesthetically pleasing arrangement.
- Incorporate Lace and Embellishments: Add a touch of nostalgia with lace or other vintage-themed embellishments, enhancing the overall elegance of the DIY 70th birthday card.
- Secure Attachments: Use glue or double-sided tape to securely attach each vintage photo and embellishment to the card, ensuring a cohesive and refined appearance.
- Personalize with Markers: Include handwritten dates, brief captions, or notes beside each vintage photo using markers for an extra personalized touch.
- Reflective Notes: Leave spaces for handwritten reflective notes or additional well-wishes from friends and family, enhancing the sentimental value.
- Extend Theme Inside and Out: Extend the Vintage Theme to both the interior and exterior of the card, incorporating additional decorative elements for a complete, elegant look.
- Final Review: Take a moment to review your creation, ensuring all elements are securely attached, and the vintage theme is seamlessly portrayed.
Family Tree DIY 70th Birthday Card – Rooted In Family
Crafting a Family Tree birthday card rooted in family is a meaningful and personalized way to celebrate a 70th birthday. Here’s what you’ll need:
- Supplies: Family photographs, cardstock or a blank card, markers or pens, and decorative elements like small tree cutouts or stickers.
- Instructions:
- Gather Family Photographs: Collect photographs representing different generations and branches of the family tree to evoke a sense of connection and shared history.
- Prepare Your Canvas: Use cardstock or a blank card as the foundation for your Family Tree card, providing a sturdy base for your heartfelt creation.
- Create the Family Tree Structure: Draw a simple tree on your DIY 70th birthday card, designating branches for various family members. This visual representation symbolizes the interconnectedness and shared roots.
- Attach Family Photographs: Affix family photographs to the designated branches, placing each picture next to the corresponding family member. Ensure secure attachment using glue or double-sided tape.
- Personalize with Markers: Add names, relationships, or brief captions to personalize the Family Tree, enhancing its significance.
- Decorate with Tree Elements: Use small tree cutouts, stickers, or other decorative elements to embellish the Family Tree, making it visually appealing and thematic.
- Extend Theme Inside and Out: Carry the Family Tree theme to both the interior and exterior of the card, incorporating additional decorative elements for a cohesive and heartfelt design.
- Reflective Notes: Leave spaces for handwritten reflective notes or additional well-wishes from family members, contributing to the sentimental value of your DIY 70th birthday card.
- Final Review: Take a moment to review your creation, ensuring all elements are securely attached, and the Family Tree theme is effectively conveyed.
See more: DIY 60th Birthday Card Ideas For A Personalized Celebration
Personalized Sudoku or Crossword – Life Puzzles Solved
Creating a Personalized Sudoku or Crossword birthday card, titled “Life Puzzles Solved,” adds an interactive and thoughtful touch to the celebration. Here’s what you’ll need:
- Supplies: Blank card or cardstock, markers or pens, ruler, printed Sudoku or crossword puzzle template, and personalized clues or answers related to the individual’s life.

- Instructions:
- Select Puzzle Type: Choose between Sudoku or a Crossword puzzle based on the celebrant’s preference or the overall theme of the card.
- Prepare Your Canvas: Use a blank card or cut a piece of cardstock to the desired size for your puzzle. This serves as the foundation for your interactive birthday card.
- Draw Puzzle Grid (For Crossword): If creating a crossword puzzle, draw a grid on the card using a ruler. Ensure there is enough space for the words and clues.
- Print Puzzle Template (For Sudoku): If opting for Sudoku, print a Sudoku puzzle template and affix it to your DIY 70th birthday card. Leave space for additional personalization.
- Personalize Clues or Numbers: Replace traditional puzzle clues with personalized hints or anecdotes related to the celebrant’s life. Alternatively, customize the Sudoku numbers to represent significant dates or age-related themes.
- Decorate the Surroundings: Enhance the overall design by adding decorations or themed elements around the puzzle, making it visually appealing.
- Extend Theme Inside and Out: Carry the puzzle theme to both the interior and exterior of your DIY 70th birthday card, ensuring a cohesive and engaging design.
- Reflective Notes: Leave space for handwritten notes or additional well-wishes, encouraging the celebrant to engage with the puzzle and reminisce.
- Final Review: Ensure the puzzle is clear, and personalized elements are incorporated seamlessly into the design.
Photo Collage Number – Seventy Shades Smiled
Create a Photo Collage Number titled “Seventy Shades Smiled” for a personalized and visually striking 70th birthday card with these simple steps:
- Supplies: Old photographs, cardstock or a blank card, a printed or drawn number “70” template, glue or double-sided tape, markers or pens.
- Instructions:
- Select Meaningful Photos: Gather a variety of old photographs that capture significant moments and memories throughout the celebrant’s life.
- Prepare Your Canvas: Use a blank card or cut a piece of cardstock to the desired size, creating the foundation for your Photo Collage Number.
- Print or Draw Number “70”: Print or draw a large number “70” on a separate piece of paper, ensuring it fits well on the card. This will be the central element of your collage.
- Arrange Photos in the Number “70”: Arrange the selected photos within the number “70,” ensuring they cover the entire shape. This creates a visually appealing collage that forms the iconic number.
- Secure Attachments: Use glue or double-sided tape to securely attach each photograph within the outlined number “70” on the card.
- Personalize with Markers: Add personal touches by writing dates, brief captions, or notes on the photos using markers, connecting each image to the celebrant’s life.
- Extend Theme Inside and Out: Carry the Photo Collage Number theme to both the interior and exterior of your DIY 70th birthday card, incorporating additional decorative elements for a cohesive design.
- Reflective Notes: Leave spaces for handwritten notes or additional well-wishes, enhancing the sentimental value of the card.
- Final Review: Ensure all photos are securely attached, and the Photo Collage Number effectively conveys the celebrant’s life journey.
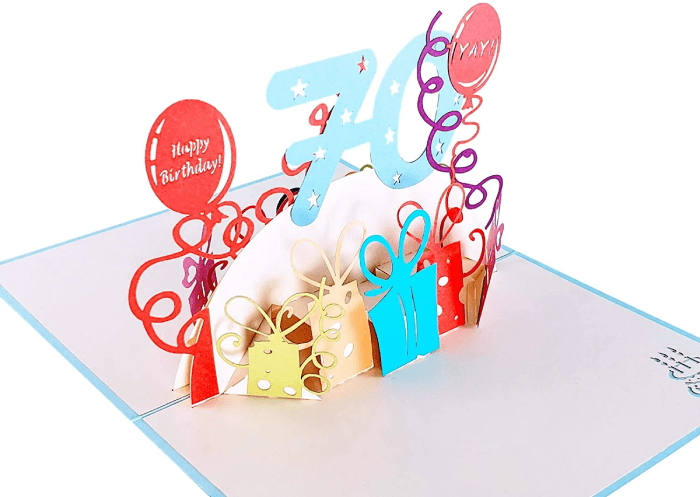
Pop-Up Balloons – Balloons of Joy
Crafting a Pop-Up Balloons birthday card, titled “Balloons of Joy,” adds an element of surprise and celebration to the 70th birthday. Here’s what you’ll need:
- Supplies: Blank card or cardstock, colored paper or cardstock, scissors, glue, markers or pens.

- Instructions:
- Prepare Your Canvas: Use a blank card or cut a piece of cardstock to the desired size, creating the base for your Pop-Up Balloons card.
- Cut Balloon Shapes: Cut out balloon shapes from colored paper or cardstock. Alter the sizes to introduce visual appeal.
- Fold Balloons in Half: Fold each balloon shape in half vertically, creating a crease down the middle.
- Glue Balloons Inside the Card: Apply glue to one half of each balloon shape and affix them inside the card along the crease. Ensure that the glued side is attached to the card, leaving the other half free to pop up.
- Personalize Balloons: Use markers or pens to add details, patterns, or messages on each balloon for a personalized touch.
- Extend Theme Inside and Out: Carry the Pop-Up Balloons theme to both the interior and exterior of your DIY 70th birthday card, incorporating additional decorative elements for a cohesive design.
- Final Review: Ensure the balloons are securely attached, and the pop-up feature works smoothly.
Travel-themed Card – Journey Through Seventy
Creating a Travel-themed birthday card, titled “Journey Through Seventy,” adds a sense of adventure to the 70th celebration. Here’s what you’ll need:
- Supplies: Blank card or cardstock, map or travel-themed paper, scissors, glue, markers or pens.
- Instructions:
- Prepare Your Canvas: Use a blank card or cut a piece of cardstock to the desired size, forming the base for your Travel-themed card.
- Cut Travel-themed Elements: Cut out map or travel-themed paper in shapes like planes, suitcases, or landmarks to represent the journey.
- Arrange Elements on the Card: Place the cut-out travel-themed elements strategically on the card, creating a visually appealing and cohesive design.
- Glue Elements in Place: Apply glue to the back of each cut-out element and affix them securely to the card.
- Personalize the Journey: Use markers or pens to add route lines, destinations, or other personalized touches to enhance the travel theme.
- Extend Theme Inside and Out: Carry the Travel-themed theme to both the interior and exterior of your DIY 70th birthday card, adding any additional decorative elements for a complete design.
- Reflective Notes: Leave space for handwritten notes or well-wishes, adding a personal touch to the overall travel narrative.
- Final Review: Ensure all elements are securely attached, and the travel theme effectively captures the essence of the celebrant’s journey.
Quilted Memories – Stitched Life Stories
Crafting a Quilted Memories birthday card, titled “Stitched Life Stories,” adds a touch of warmth and nostalgia to the 70th celebration. Here’s what you’ll need for the best birthday card DIY:
- Supplies: Blank card or cardstock, fabric or quilt-patterned paper, scissors, glue, markers or pens.

- Instructions:
- Prepare Your Canvas: Use a blank card or cut a piece of cardstock to the desired size, creating the foundation for your Quilted Memories card.
- Cut Quilt-patterned Elements: Cut out fabric or use quilt-patterned paper in shapes like squares or rectangles to resemble quilt pieces.
- Arrange Quilted Elements on the Card: Place the cut-out quilt-patterned elements strategically on your DIY 70th birthday card, creating a quilted design that represents stitched life stories.
- Glue Elements in Place: Apply glue to the back of each quilt-patterned element and affix them securely to the card, creating the appearance of a quilt.
- Personalize the Quilt: Use markers or pens to add stitching lines, personalized patterns, or even brief notes within each quilt piece, symbolizing individual life stories.
- Extend Theme Inside and Out: Carry the Quilted Memories theme to both the interior and exterior of your DIY 70th birthday card, adding any additional decorative elements for a cohesive design.
- Reflective Notes: Leave space for handwritten notes or well-wishes, adding a personal touch to the overall quilted narrative.
- Final Review: Ensure all elements are securely attached, and the quilted theme effectively captures the essence of the celebrant’s life stories.
Golden Years Shaker Card – Golden Sparkle Celebration
Creating a Golden Years Shaker Card, titled “Golden Sparkle Celebration,” adds a touch of glamour and festivity to the 70th birthday celebration. Here’s what you’ll need:
- Supplies: Blank card or cardstock, clear plastic sheet, gold sequins or confetti, gold glitter, double-sided foam tape, glue, markers or pens.
- Instructions:
- Prepare Your Canvas: Use a blank card or cut a piece of cardstock to the desired size, forming the base for your Golden Years Shaker Card.
- Cut Clear Plastic Sheet: Cut the clear plastic sheet to match the size of the card, creating a transparent window for the shaker element.
- Create the Shaker Element: Apply double-sided foam tape along the edges of the plastic sheet, creating a border. Ensure no gaps to prevent sequins from escaping.
- Add Sequins and Glitter: Place gold sequins or confetti and a sprinkle of gold glitter within the foam tape borders on the plastic sheet. This creates a dynamic and shimmering shaker element.
- Secure the Shaker Element: Carefully place the plastic sheet over your DIY 70th birthday card, ensuring the sequins and glitter are trapped within the foam tape borders.
- Seal the Shaker Element: Press down on the plastic sheet to secure it in place, effectively sealing the shaker element.
- Decorate the Card: Use markers or pens to add additional decorative elements to the card, enhancing the overall golden celebration theme.
- Extend Theme Inside and Out: Carry the Golden Years Shaker Card theme to both the interior and exterior of the card, adding any extra embellishments for a complete design.
- Reflective Notes: Leave space for handwritten notes or well-wishes, contributing to the celebratory atmosphere.
- Final Review: Ensure the shaker element is securely sealed, and the overall design captures the festive essence of the golden celebration.
Thoughtful Words To Write In Your DIY Card For 70th Birthday
As long as you create the best DIY 70th birthday card, it’s time to pen down your heartfelt wishes. Consider incorporating these thoughtful phrases:

- “As you turn 70, take a moment to reflect on the incredible journey you’ve had. Here’s to many more adventures ahead!”
- “Happy 70th! May your days be as golden as the memories you’ve created throughout the years.”
- “70 years of vintage perfection! May your birthday be as timeless and cherished as your favorite old records.”
- “Happy 70th! May your next adventure be just as thrilling as the countless ones you’ve had so far.”
- “Welcome to the fabulous 70s club! May this decade be filled with laughter, adventure, and the joy of knowing you’re only as old as you feel.”
- “Happy Birthday! Joining the 70s club has never been this fabulous. May your days be filled with love, joy, and countless reasons to smile.”
- “Cheers to 70 wonderful years! Age is just a number, but your positive energy and zest for life are truly inspiring. Here’s to a decade filled with more laughter and unforgettable moments!”
- “Happy Birthday! 70 is just a number, but your spirit is timeless. Wishing you a decade filled with new experiences and endless joy!”
- “Celebrating 70 years of living life in style! May this year be as vibrant and exciting as you are. Cheers to the grooviest septuagenarian around!”
- “Happy 70th! May the next chapter of your life be filled with love, laughter, and all the amazing adventures you’ve yet to embark on.”
In conclusion, creating a DIY 70th birthday card is not just a craft; it’s a heartfelt expression of love and appreciation for a life well-lived. Grab your crafting supplies, unleash your creativity, and make the 70s perfect with personalized DIY cards for 70th birthday and thoughtful gift ideas. Happy crafting!