
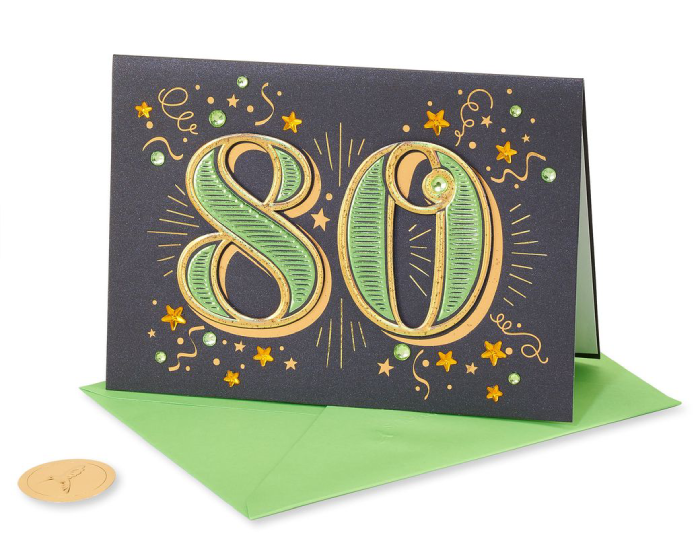
Best DIY 80th Birthday Card Ideas to Celebrate a Milestone
Turning 80 is an extraordinary milestone that deserves special celebration. One heartfelt way to commemorate this occasion is by crafting a DIY 80th birthday card. For this reason, we’ve got a curated collection of the best handmade 80th birthday cards ideas here, ranging from traditional to creative designs.
How Do Seniors Want Their 80th Birthday Cards To Be?
Reaching the age of 80 calls for a unique and thoughtful approach to crafting birthday cards. Understanding what seniors desire in their birthday cards is crucial for creating a meaningful and memorable keepsake. Here are the key characteristics that seniors often appreciate:
- Nostalgia: Nostalgic elements can evoke warm emotions. Incorporate elements from the past, such as old photographs or vintage-inspired designs, to create a sense of nostalgia.
- Large Text and Readability: As eyesight may diminish with age, ensuring large and readable text is essential. Opt for clear fonts and consider using larger text sizes to make the card easily readable.
- Warm Colors: Warm and inviting colors can create a positive and uplifting atmosphere. Choose colors that convey warmth, such as soft yellows, gentle blues, or earthy tones.
Basic Tools Needed To Make DIY 80th Birthday Cards
Before diving into crafting, it’s essential to gather the necessary tools. Whether you’re a seasoned crafter or a beginner, having the right tools ensures a smooth and enjoyable card-making process. Here is a compilation of fundamental tools that will be essential for birthday cards DIY:
- High-quality cardstock or blank cards
- Assorted colored markers and pens
- Adhesive, such as glue or double-sided tape
- Scissors or crafting knife
- Decorative elements like stickers, ribbons, and embellishments
- Photographs or printed images for personalization
- A ruler for precise measurements
Best DIY 80th Birthday Card Ideas To Warm Their Heart
Now that we have covered the essentials, let’s explore a variety of DIY cards for 80th birthday ideas suitable for different levels of craftsmanship.
Traditional Handmade 80th Birthday Cards
For those who appreciate classic and timeless designs, traditional handmade cards are an excellent choice. Consider these DIY ideas:
- Vintage Elegance
Introducing the Vintage Elegance card—a timeless creation infused with nostalgic charm. This DIY masterpiece combines elements of lace, doilies, and muted colors to craft a sophisticated and heartfelt birthday greeting.
Step 1: Gather Your Materials
Collect materials such as blank cards or high-quality cardstock, lace, doilies, muted-colored paper or cardstock, scissors, adhesive (glue or double-sided tape), and classic fonts for printing.
Step 2: Choose a Color Palette
Select a muted color palette for your DIY 80th birthday card that exudes vintage charm. Soft yellows, pastel blues, and earthy tones work well. Ensure that the colors complement each other for an elegant look.
Step 3: Card Base
Cut your blank card or cardstock to the desired size. This will serve as the base of your vintage card.
Step 4: Incorporate Lace and Doilies
Adorn the card with lace and doilies. You can place them strategically around the edges or as a central focal point, creating a visually pleasing layout.
Step 5: Choose a Classic Font
Select a classic and easily readable font for the birthday message. You can either print the message directly onto the card or use letter stamps if you prefer a handmade touch.
Step 6: Assemble Your Vintage Card
Carefully attach the lace, doilies, and any additional embellishments to the DIY 80th birthday card. Ensure everything is securely in place, creating an overall vintage and elegant aesthetic.

- Photo Collage Memories
Each snapshot captures a moment in time, forming a visually captivating and emotionally resonant birthday card that celebrates the rich tapestry of the recipient’s life. Join us in crafting a heartfelt homage to memories that endure across the years.
Step 1: Gather Photos
Collect a variety of photos representing different stages of the recipient’s life. Choose images that evoke memories and tell a story.
Step 2: Select a Card Base
Choose a blank card or cardstock as the base for your collage. The size can vary based on your preference.
Step 3: Arrange Photos
Lay out the photos in a visually appealing arrangement. Consider the chronological order or create a collage that forms a specific shape, such as a heart or number 80.
Step 4: Adhere Photos
Once you’re satisfied with the arrangement, use adhesive to secure the photos onto the DIY 80th birthday card. Ensure that each photo is attached securely.
Step 5: Add Captions or Labels
Consider adding captions or labels to the photos, identifying the people, places, or moments depicted. This adds a personal touch and helps tell the story.
Step 6: Decorate the Edges
Enhance the visual appeal by decorating the edges of the card. You can use colored markers, washi tape, or small embellishments that complement the overall theme.
- Embroidered Greeting
Discover the art of simple embroidery as we guide you through crafting a card adorned with delicate stitches. This technique adds a touch of sophistication and uniqueness, transforming a birthday greeting into a tangible work of art.
Step 1: Select a Design
Choose a simple embroidery design that complements the theme of the homemade 80th birthday cards. This could be a small flower, heart, or a personalized initial.
Step 2: Gather Materials
Collect materials such as blank cards or cardstock, embroidery thread in desired colors, embroidery needle, embroidery hoop, and a pencil for sketching the design.
Step 3: Sketch the Design
Lightly sketch the chosen embroidery design onto the card using a pencil. This serves as a guide for the stitching.
Step 4: Prepare the Embroidery Hoop
Secure the DIY 80th birthday card in the embroidery hoop, ensuring it’s taut and stable. This makes it easier to stitch without damaging the card.
Step 5: Embroider the Design
Using the selected embroidery thread, carefully stitch the design onto the card. Follow your sketched outline, creating neat and even stitches.

Easy Homemade 80th Birthday Cards
For those who prefer simplicity without compromising the personal touch, here are some easy DIY ideas by giftideas:
- Minimalist Elegance
With a focus on graceful simplicity, a heartfelt message, and strategic embellishments, the Minimalist Elegance DIY cards for 80th birthday are poised to make a striking impact.
Step 1: Select a Color Palette
Choose a single color palette that aligns with the minimalist theme. Classic choices include whites, neutrals, or pastel tones. Ensure that the selected color promotes a sense of elegance.
Step 2: Choose a Card Base
Select a blank card or cardstock that complements the chosen color palette. The size can vary based on your preference.
Step 3: Clean Lines and Simple Shapes
Incorporate clean lines and simple shapes to form the basis of your DIY 80th birthday card design. Consider geometric patterns or a straightforward layout for a modern and elegant look.
Step 4: Heartfelt Message Placement
Decide where you want to place the heartfelt birthday message. Consider using a classic font or elegant script. The placement should balance the overall design.
Step 5: Well-Placed Embellishments
Add a few well-placed embellishments to enhance the minimalist design. This could include a small ribbon, a delicate sticker, or a subtle metallic accent. Remember, less is more in minimalist design.
Step 6: Assemble the Card
Carefully attach all elements to the DIY 80th birthday card. Pay attention to spacing and alignment to maintain the clean and elegant aesthetic.
- Printable Templates
Utilizing the wealth of free or affordable templates available, we’ll guide you through the process of personalizing a card with the recipient’s name and a thoughtful message.

Step 1: Choose a Template
Explore online platforms that offer free or affordable printable birthday card templates. Choose a template that resonates with the recipient’s taste and the overall theme you have in mind.
Step 2: Personalize the Template
Download the selected template and open it in a graphic editing tool if necessary. Personalize the template by adding the recipient’s name, a customized message, and any additional elements that make it unique.
Step 3: Select High-Quality Paper
Print the customized template on high-quality cardstock or paper. The paper choice contributes to the overall look and feel of the card.
Step 4: Cut and Fold
Carefully cut along the template’s edges, following the guidelines. Fold the card along the designated lines to create a polished and professional finish.
Step 5: Add Extra Touches
Consider adding extra touches such as a matching envelope or a seal for a more polished presentation. These details elevate the overall impression of the printable DIY 80th birthday card.
- Stamped Impressions
A captivating technique that transforms a simple card into a visually appealing masterpiece. In this creative endeavor, we’ll explore the art of using rubber stamps to craft a birthday card with personalized flair.
Step 1: Gather Materials
Collect materials such as blank cards or cardstock, rubber stamps in various designs, ink pads in desired colors, and a stamping block for stability.
Step 2: Choose a Card Base
Select a blank card or cardstock as the base for your stamped design. The size can vary based on your preference.
Step 3: Experiment with Stamp Designs
Explore different rubber stamp designs and experiment with their arrangement on a separate piece of paper. This allows you to plan the layout before committing to the final design.
Step 4: Ink the Stamps
Once you’re satisfied with the design, ink the rubber stamps with the chosen colors. Ensure even coverage for clear and crisp impressions.
Step 5: Stamp the Card
Carefully stamp the chosen designs onto the card. Experiment with placement, overlapping, or creating a border, depending on your vision for the card.
Creative DIY 80th Birthday Card Ideas
For those who want their cards to stand out and be remembered, let your creativity shine with these ideas:
- Pop-Up Surprise
In this exciting venture, we’ll explore the art of crafting a card that unfolds to reveal a hidden message or image, adding an element of surprise and celebration. Get ready to elevate your DIY card game and infuse the joy of discovery into your heartfelt birthday wishes.

Step 1: Choose Your Card Base
Select a sturdy cardstock as your base. Ensure it’s thick enough to support the pop-up elements.
Step 2: Plan the Pop-Up Design
Decide on the theme or shape of your pop-up element. It could be a number 80, a birthday cake, or any design that holds significance for the recipient.
Step 3: Create the Pop-Up Mechanism
Cut a separate piece of cardstock for the pop-up mechanism. Attach it to the inside of the card and fold it strategically to create the pop-up effect. Test the mechanism before finalizing the placement.
Step 4: Decorate the Pop-Up Element
Add decorations to the pop-up element, such as colorful paper or small embellishments. Ensure that the decorations enhance the surprise when the DIY 80th birthday card is opened.
- Quilled Artistry
Join us as we explore this fascinating technique, where each quilled element becomes a brushstroke, contributing to a visually stunning and personalized birthday card.
Step 1: Gather Materials
Collect colored paper strips, a quilling tool, adhesive, and a blank card or cardstock.
Step 2: Choose a Quilling Design
Decide on the quilling design you want to create. It could be flowers, patterns, or any shape that aligns with the birthday theme.
Step 3: Roll and Shape Strips
Using the quilling tool, roll the paper strips into coils. Experiment with different shapes by pinching and arranging the coils.
Step 4: Attach Quilled Elements to the Card
Secure the quilled elements onto the card using adhesive. Create the overall design by arranging the quilled shapes in a visually pleasing manner.
Step 5: Add Extra Details
Consider adding extra details, such as small beads or additional paper elements, to enhance the intricacy of the quilled design.

- Interactive Elements
In this imaginative exploration, we’ll guide you through the process of incorporating interactive elements into your DIY card. From pull tabs to flaps and rotating mechanisms, discover how to add surprises that engage and delight.
Step 1: Choose Interactive Elements
Decide on the interactive elements you want to incorporate, such as pull tabs, flaps, or rotating mechanisms. Plan where these elements will be placed on your DIY 80th birthday card.
Step 2: Create the Interactive Mechanisms
Cut and fold additional pieces of cardstock to create the interactive mechanisms. Attach these to the card strategically, ensuring they function smoothly.
Step 3: Design the Interactive Elements
Decorate the interactive elements with thematic designs or patterns. Consider how these designs will be revealed or activated when the card is opened.
Step 4: Personalize the Card
Add a personalized message inside the card, taking into account the interactive elements. Consider incorporating the number 80 or other relevant symbols.
See more: DIY Birthday Cards for Dad That Will Make His Day Extra Special
In conclusion, the best DIY 80th birthday cards are those that combine craftsmanship with a personal touch, creating a truly exceptional and meaningful gift. Embrace the joy of creating and sharing these special moments with the ones you love. Happy crafting!